


Home Studio Photoshoot - How to get studio like shots at home

So you think good studio photography needs an expensive studio and expensive gears? Think again!
The portrait on the left has been taken in a little cottage up in Snowdonia (Wales). I've had a break there with my wife and her mum. On the day we had planned to go out shooting some portraits for them, it was raining cats and dogs! So we had to go back to the cottage and have some tea and biscuit. But I didn't want to end the day without any picture, so we decided to turn the cottage's living room in a budget home photography studio and use what is available as backdrop. So here I was using the doors, kitchen and white wall and my standard strobist kit.
The equipment
You don't need to buy bulky and heavy expensive studio lights to be able to acheive high standard studio portraits. Recents flashguns such as the Nikon SB-900, SB-800 or even the small SB-600 have enough power and features to allow very decent results.
For this home studio shoot I've used the my usual flash photography equipment as follow:
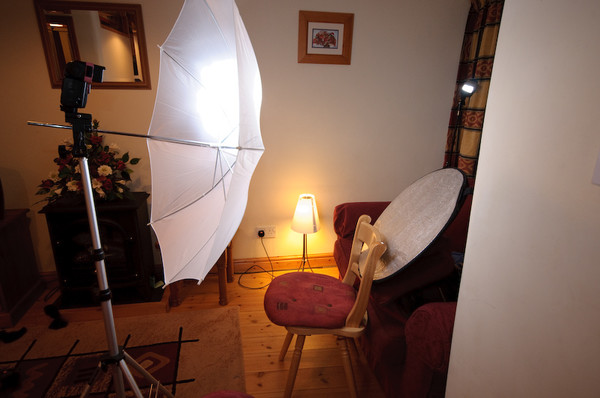
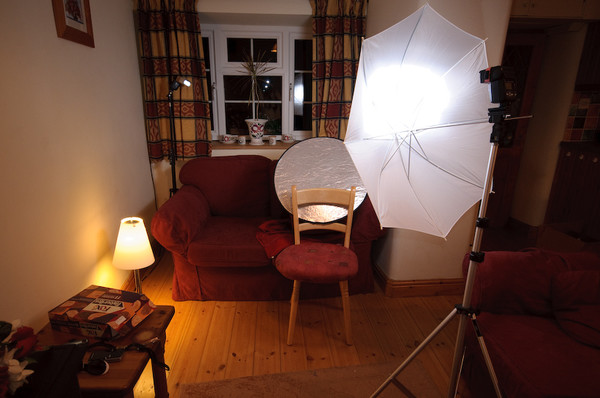
- two Nikon SB-600 Speedlight flashguns. Those little flashes are very light and portable, even though they don't have all the features of their big brothers, they are more than enough for most of my photography work. And as they are CLS enabled, I can trigger them and control their power remotely from my camera, this helps a lot as I don't have to run forth and back to tweak my flashes.
- two lightstands to hold and dispose my flashguns as I want.
- a white shoot thru umbrella that gives me a nice and soft light that wraps around my model.
- a DIY grid spot and a full CTO + a 1/4 CTO gel fot the hair light
- a table lamp with tungsten bulb to light up the white wall behind the model
As you can see, these equipment are relatively affordable and this is about all I need to do virtually all kind of portraiture.
The studio
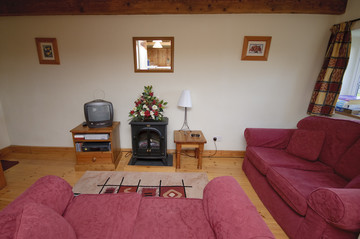
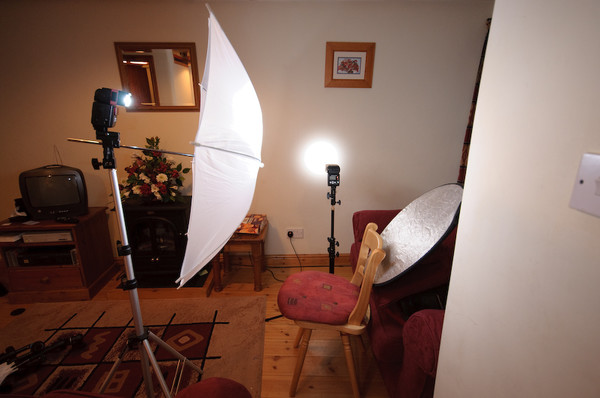
Here's is a photograph of the living room as we arrived and discover the cottage. This will become my studio: it is tidy, has some nice features and a white wall. If you look into a location closely, there will always be an area that you can use as a backdrop. Just try you don't know what you may get.
The result
|

|
| |
The top left picture was taken by having my wife kneel down by the little table and asked her to look at the table lamp. I then used a silver reflector on the side to bring up the shadows.
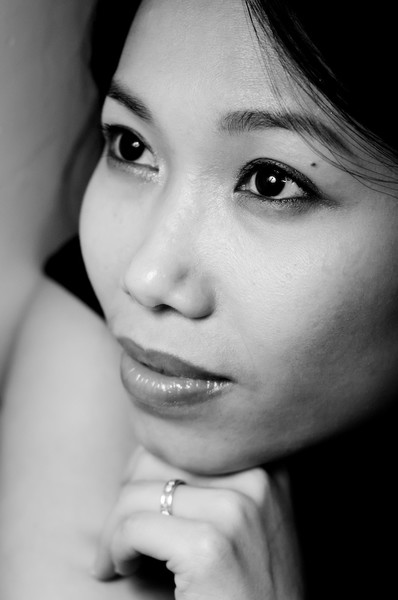
The top right picture taken on the left side of the living room. I've set a grid spot on a light stand behind her to create that little halo around her face. The key light was an SB-600 thru a white umbrella high up on the left. The use of the umbrella gave a nice, soft and wrapping light that was also softening the skin.
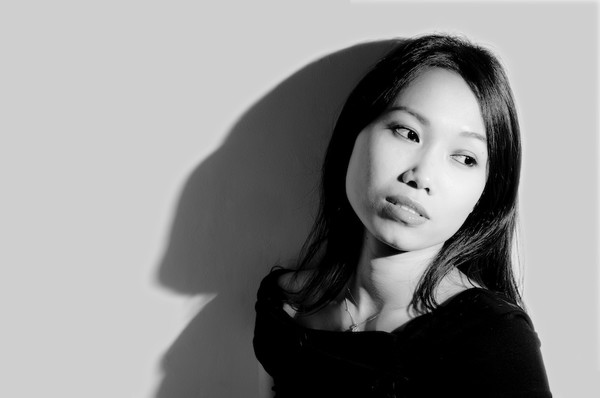
The bottom picture was also taken on the left side of the living room. I went bare and single flash. The SB-600 was set on a light stand at the camera's right pointing down to the model's face. The harsh light coming from the flashgun created a shadow cast that makes the picture more interesting.

|
|
|
|
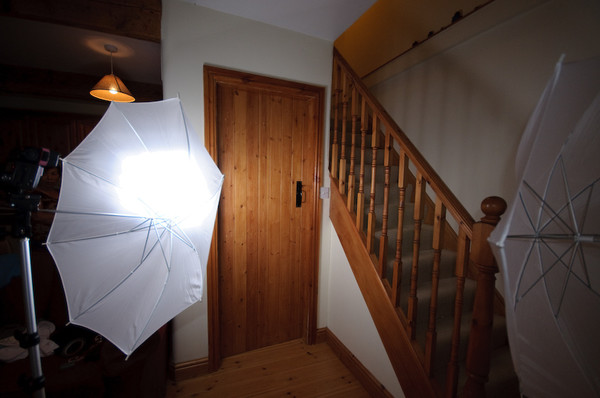
The top left picture was taken in front of the cottage's loo's door... I've used 2 SB-600 thru white brollies. One on the left as key light and another one right behind me as on-axis fill-in.
Moving my wife's mum to the right of the living room, I've used the the white wall as backdrop.
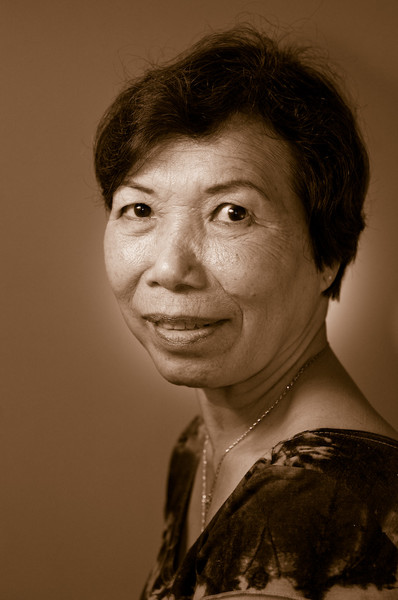
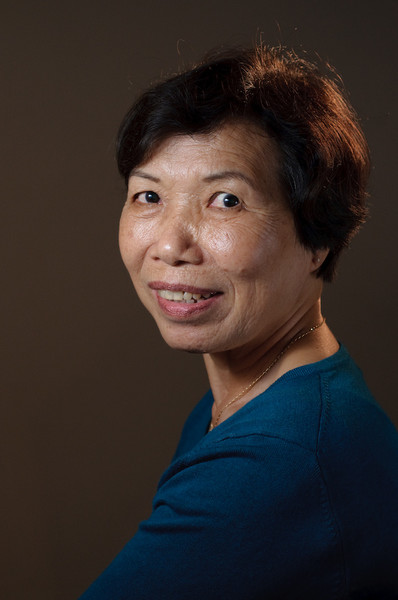
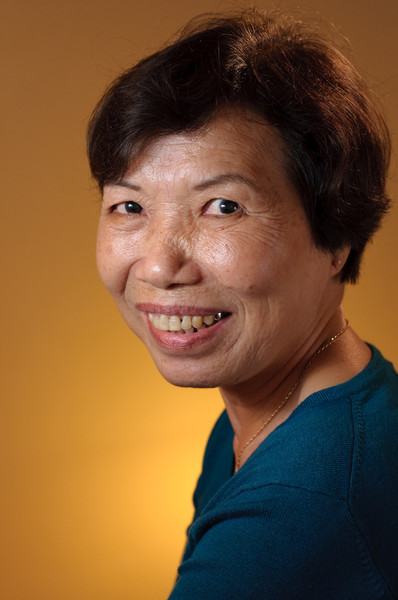
For the top right picture, I had my model on a chair. The key light was an white shoot thru brolly on the left. A grid spot was set on a SB-600 behind the subject pointing at the wall to create the round halo. The size of the halo was controlled by moving the grid spot closer/further from the wall. My key light was casting shadows on the subject side opposite to the umbrella so I brang it up using a silver reflector stuck to the chair by using some pillows.
The bottom left picture was achieve by using the grid spotted flash at the back as a hair light behind the subject on the right. I've used a CTO gel to give a warm highlight. The background was initially dark grey, receiving the little light only from the white umbrella. But I wanted it to be warmer. So I've slowed down the shutter speed a bit until some ambiance light (tungsten bulbs) got mixed into the scene. That give that browny tone to the white wall.
The effect of the bottom right picture was achieve by accident. During the session, I've noticed a shadow on the right behind my mother in law. It was the umbrella's shadow. I thought it was casted by the ceiling lamp in the cottage's kitchen, but even by switching it off the shadow was still there and I wanted that lamp to be on for a warmness in the picture. But in fact the shadow was casted by the camera's popup flash that I used as a master to remotely trigger the two SB-600. So I tried to use the table lamp on the left to hide that shadow but it was even worse as the background light was not cool. Then I just thought "why not use the lamp as a third light?". Of course! Put the lamp on the floor behind the model and you get that lovely orange/yellowish gradient light at the background that completes the blue jumper.
Conclusion
As you can see a little cottage's living room can give a lot of different styles to your portrait session. Don't be affraid of errors as long as you learn from them or use them to boost your creativity.
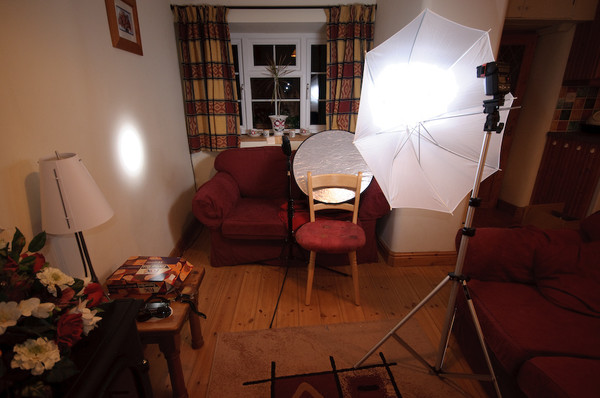
The setup shots
|
|
|
|

|

|
|
Comments